
... views
How to apply blog comment function With Fuma Comment
A review of incomplete commenting functionality, rebuilt cleanly with Fuma Comment
This article references fuma-comment Docs and repository.
Intro
I was following github and saw that velopert had starred a project. 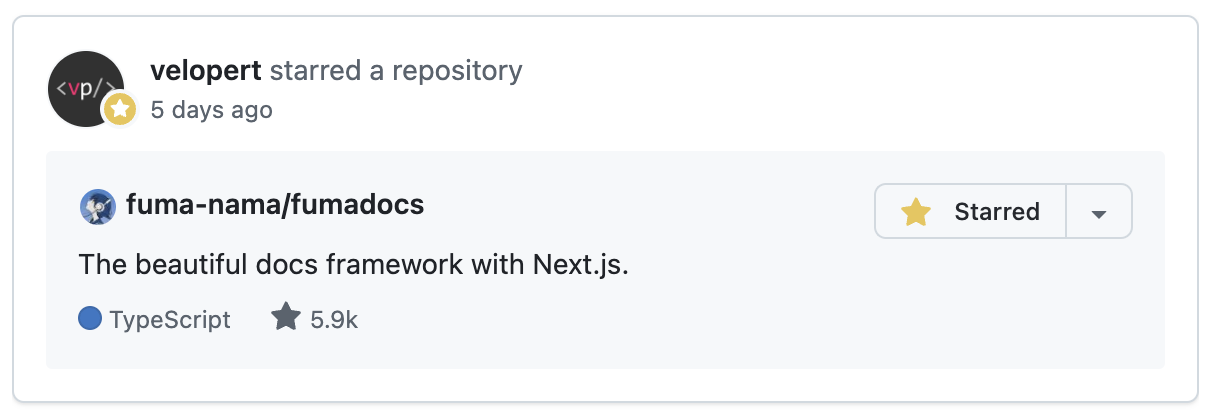
It was a project called fumadocs by [fuma-nama]. It's a documentation framework based on next.js, it's well-designed and most importantly, it makes documentation really simple. It was amazing. So, while I was spying on him, another project caught my eye. 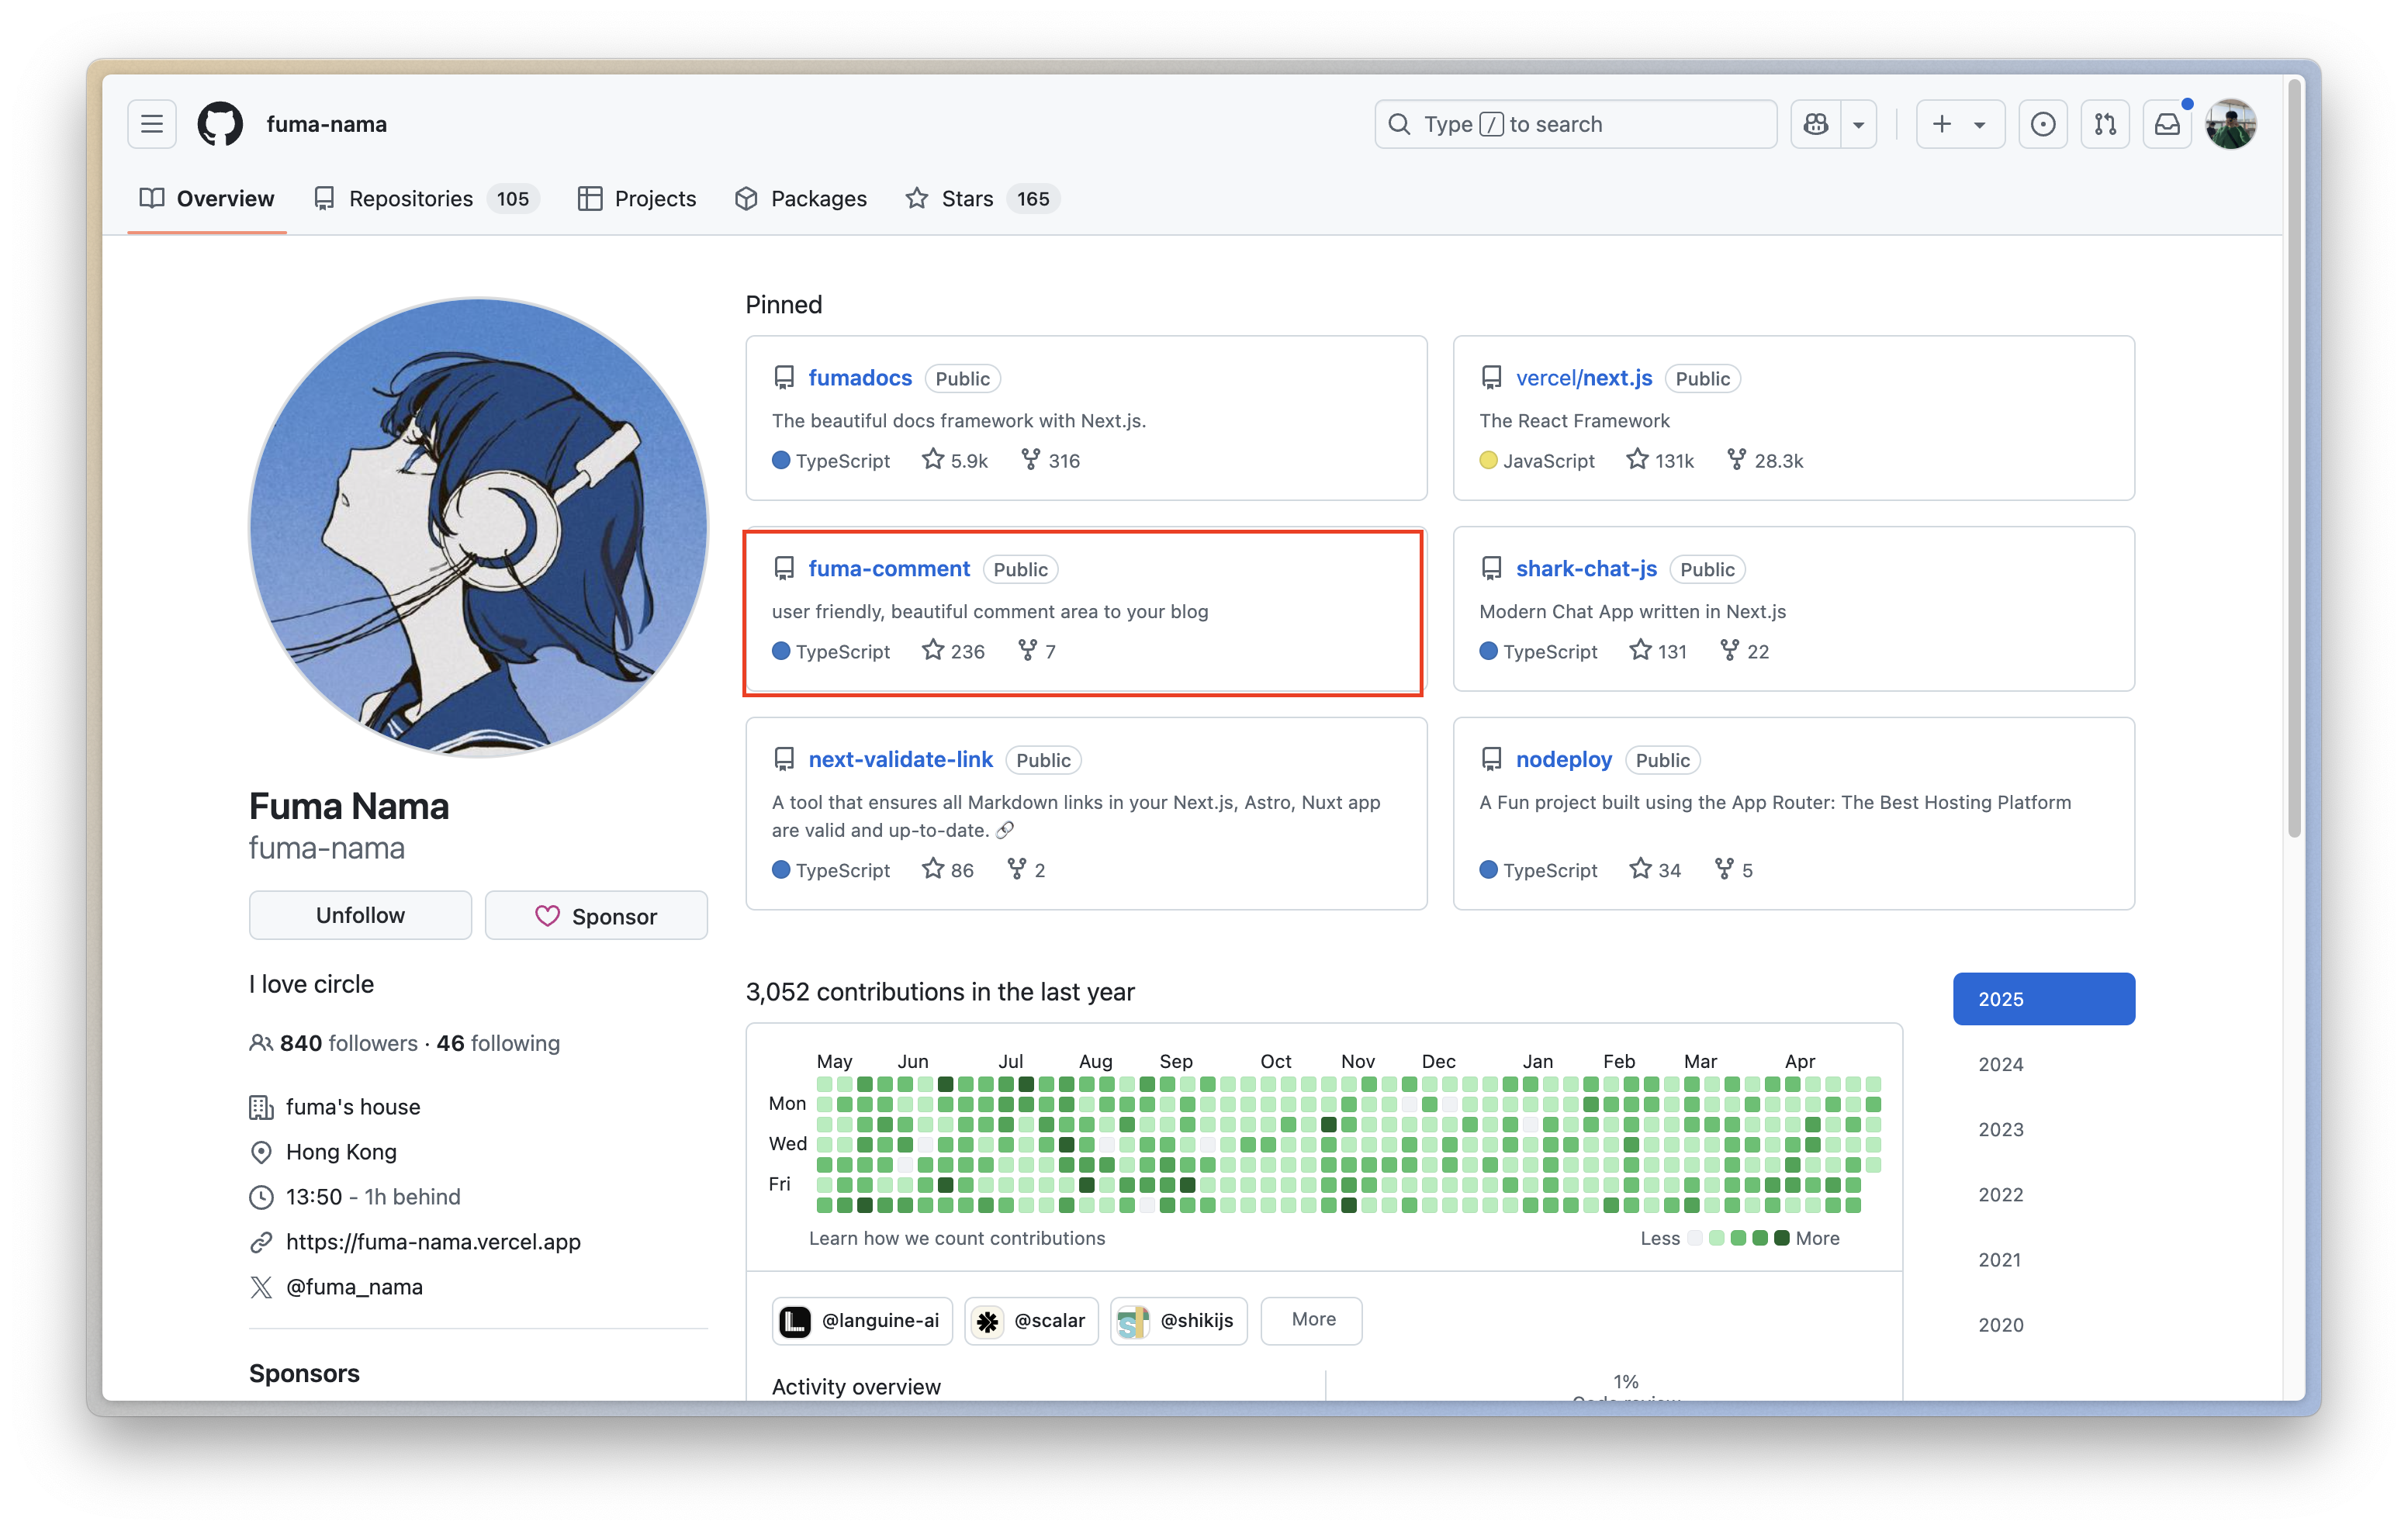
It was a project called fuma-comment, and the description said.
user friendly, beautiful comment area to your blog
I thought, "This is it!" because I've been having a lot of trouble with my blog's commenting functionality lately...
When I first built the commenting feature, I thought, **I want anyone to be able to come and comment without having to log in, so I removed OAuth, ID/PW, email, magic links, etc. as much as possible, so that people could CRUD their comments with just their **IP**... But this was problematic 😞.
- it was possible to manipulate other people's comments in situations where IPs are shared, such as in public places.
- a person's IP is not static. You could write a comment yesterday and not see the edit button today.
- Can be exploited by spoofing/proxying. It's really easy to steal that IP with a VPN/proxy.
- No notification/response. We can't identify you by your IP, and we don't know your email address.
After writing this, I wonder why I implemented only IP. Looking back, I think I implemented it because I wanted to make it easier for anyone to see my posts and leave comments, even though it was too easy. I also implemented giscus, but I was disappointed that it was difficult to customize the theme and required a github ID to use it.
So, after seeing the above project, I was convinced. You can plug in various authenticators such as next-auth, better-auth, and clerk auth, and you can customize various functions such as mention, reply, and notification.
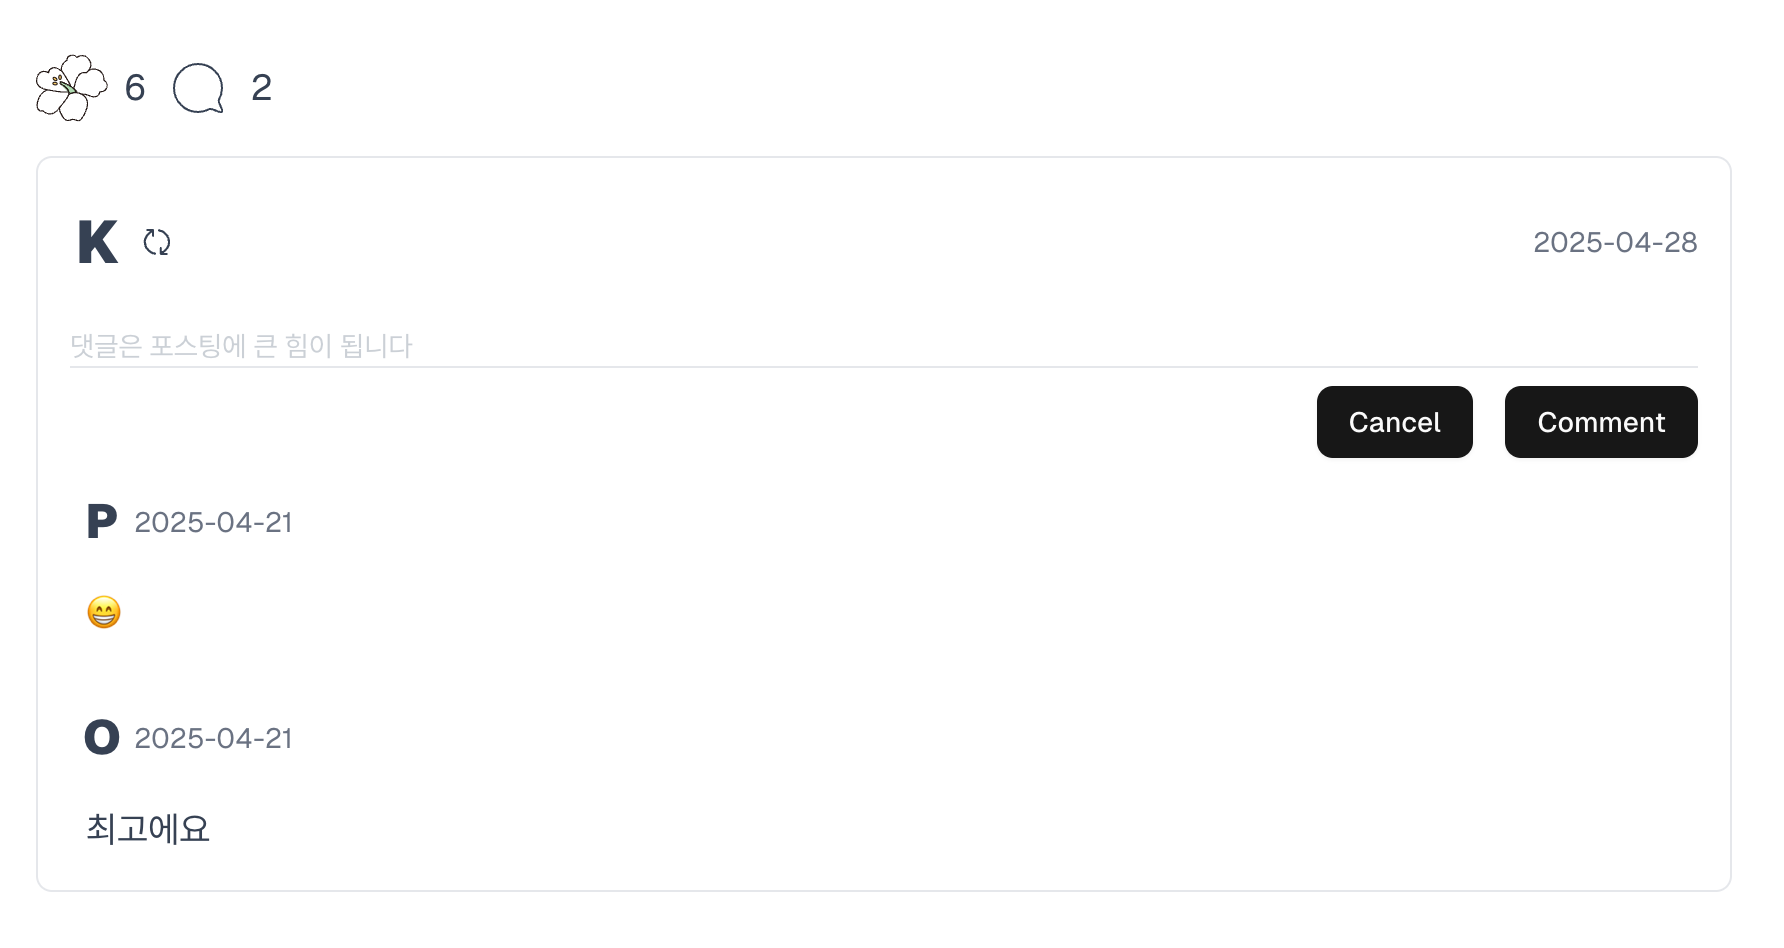
You can test the project yourself through the link below, or leave a comment.

So I decided to adapt this project to my own blog. For now, I'm going to implement it simply with Github OAuth and later I'll convert it to magic link or something else.
Overview
client: nextjs 15 with Route Handler. database: postgres ORM: prisma ObjectStorageService: uploadthing (based on S3)
Cannot be used with the export: output option in next.config.mjs because it uses Route Handler to process new requests each time.
Library
@fuma-comment/react@fuma-comment/server@prisma/clientprismauploadthing
Signin Flow
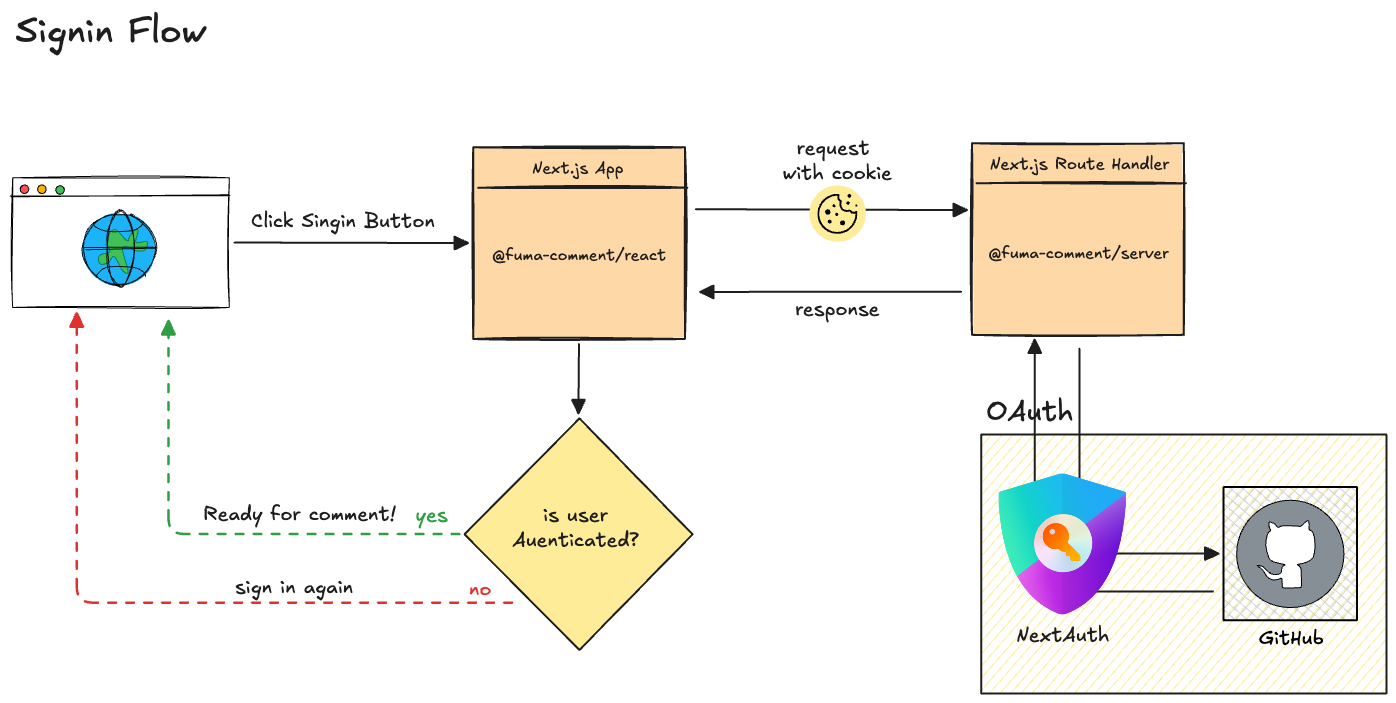 Inspired From: https://medium.com/@enes9103/building-apis-and-handling-authentication-with-next-js-9d4a8b448251
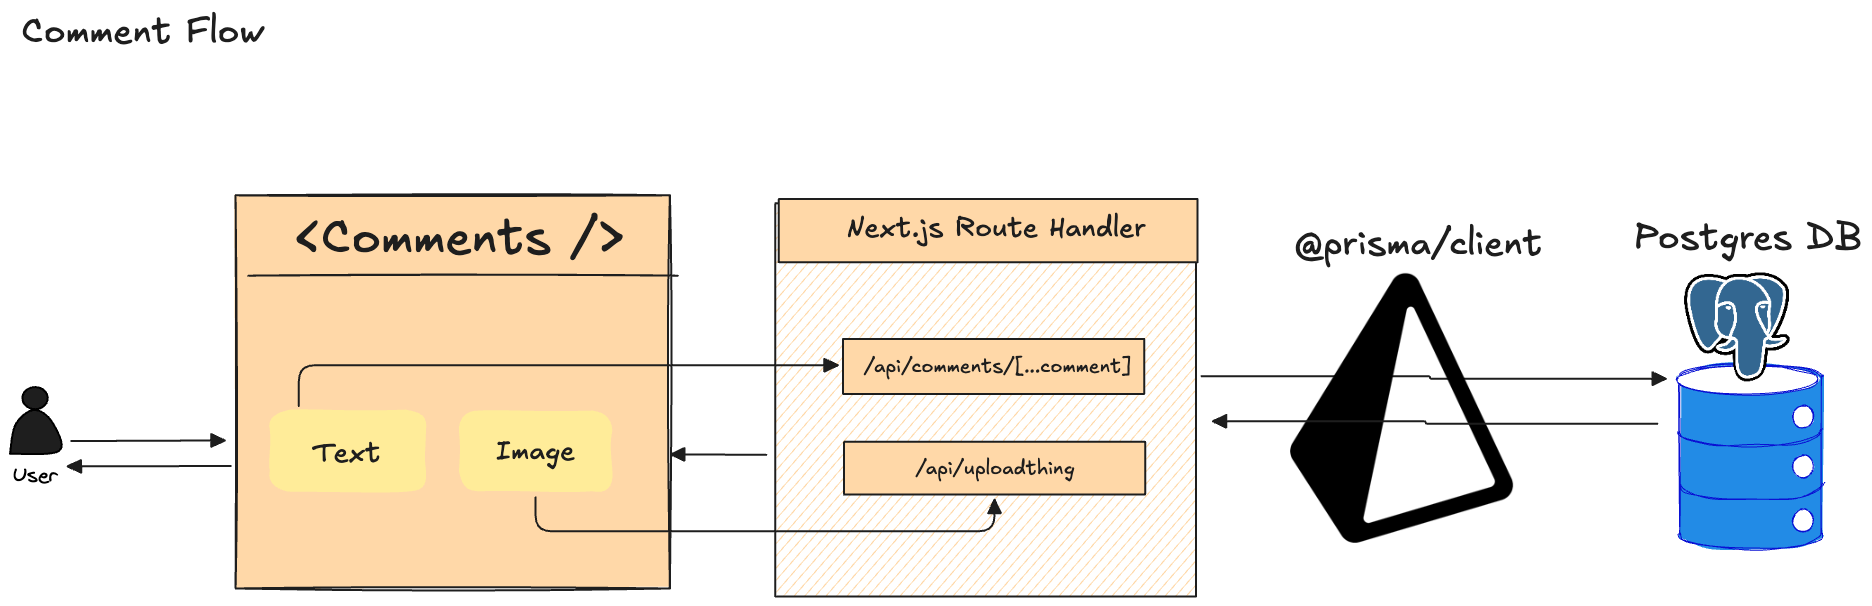
Comment Flow
---]
- DB
- Prisma
- Postgres DB
- NextJS Route Handler
- NextAuth
- uploadthing
- NextJS Client
Let's describe the implementation in order.
DB
Prepare one postgresDB, you can use the DB Provider in vercel or install it directly on your server or float it using docker.
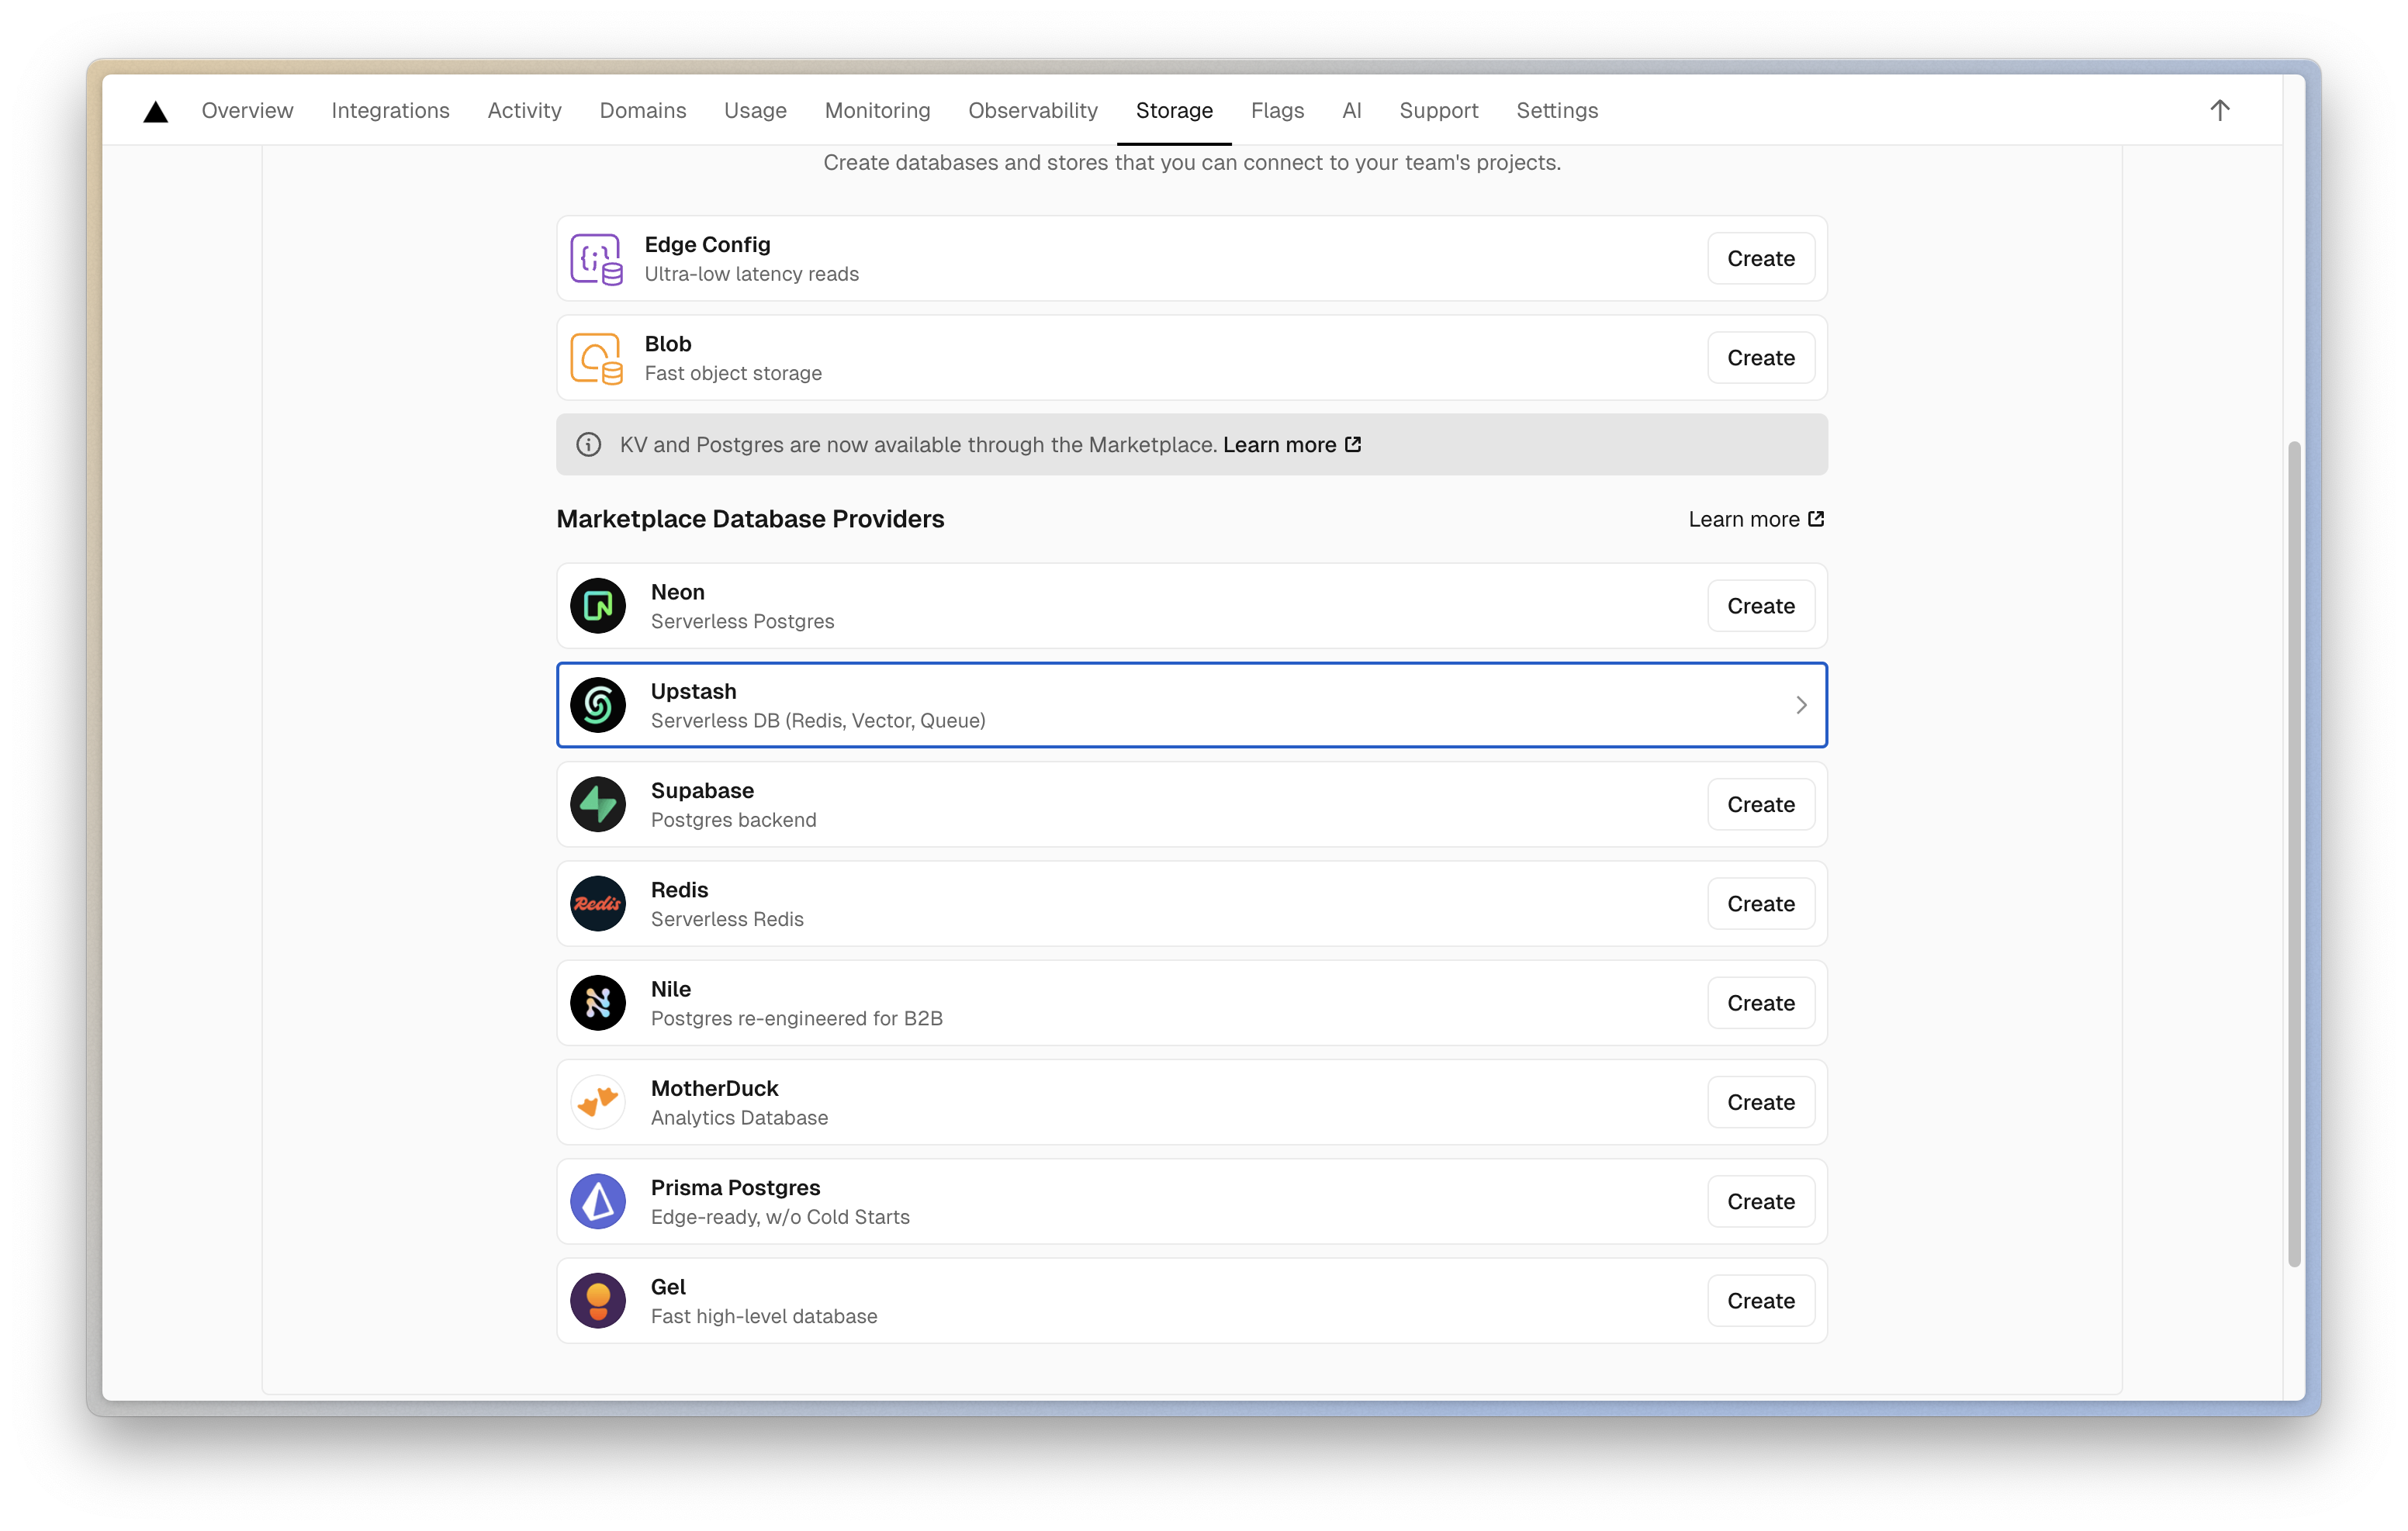
I'm using Coolify, so. I spun up a container via docker on a remote server. 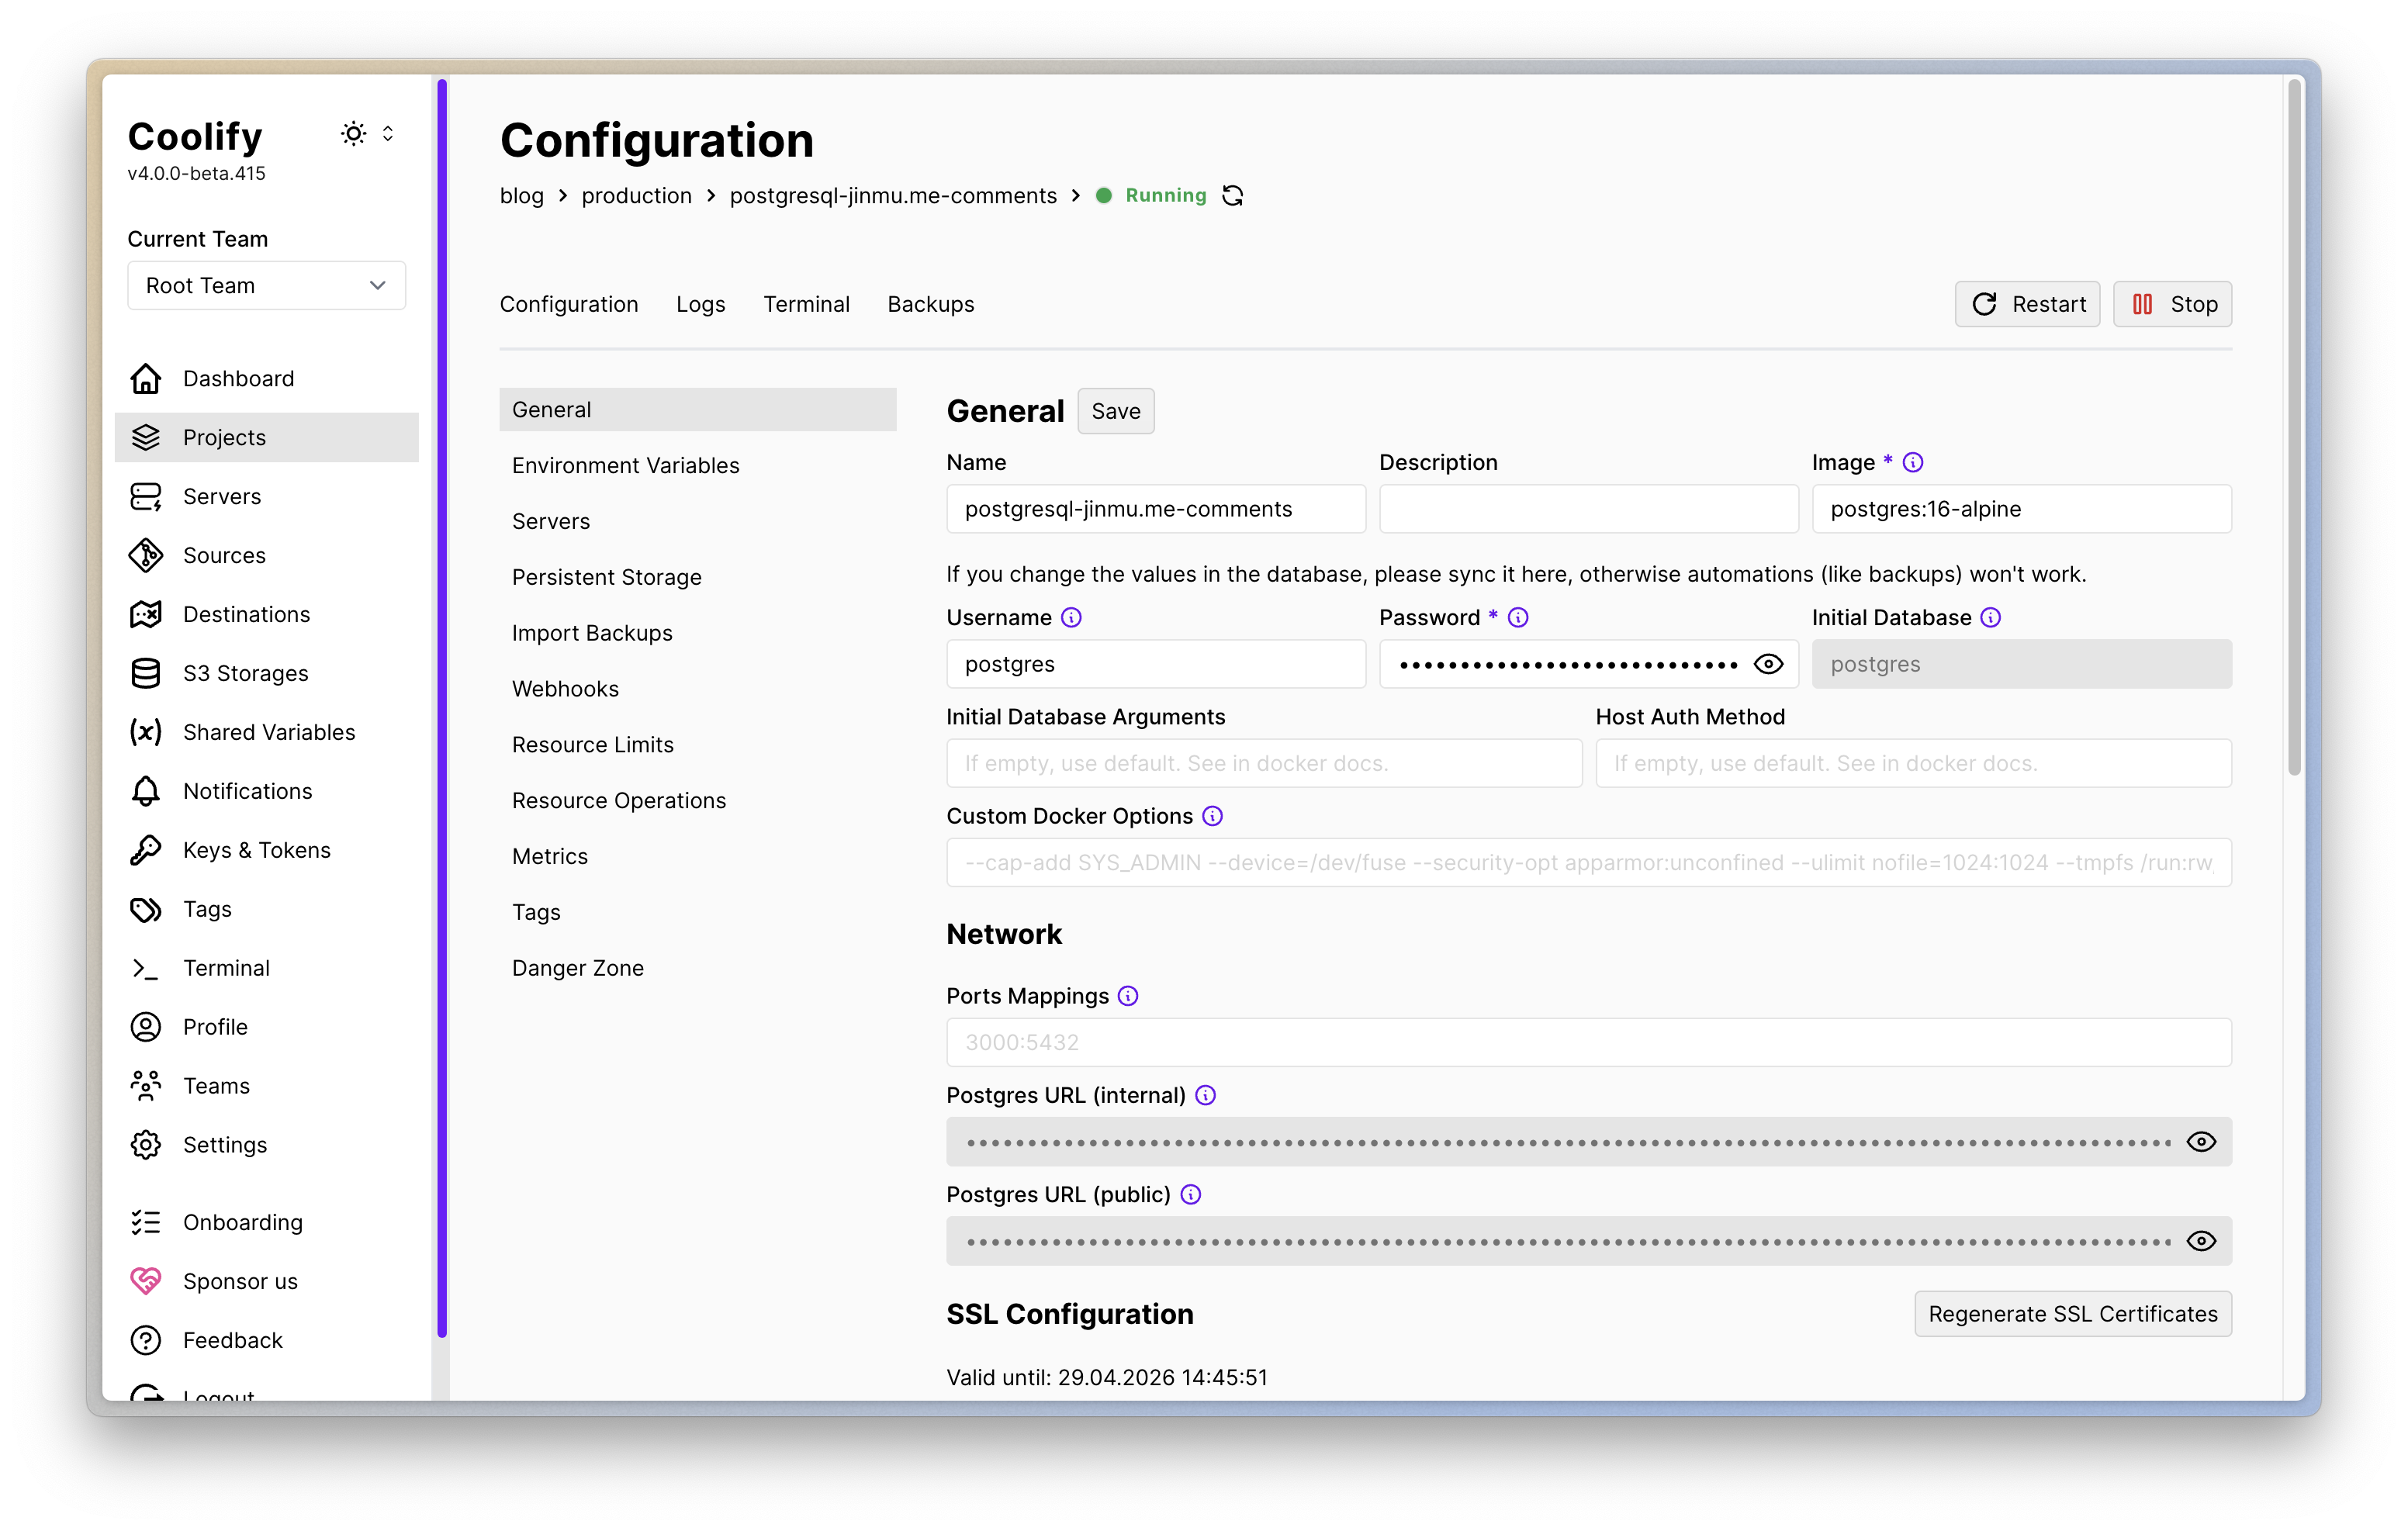
And make it public so that this DB can be accessed remotely. Allow the port on your firewall, and if it's docker, proceed with port binding.
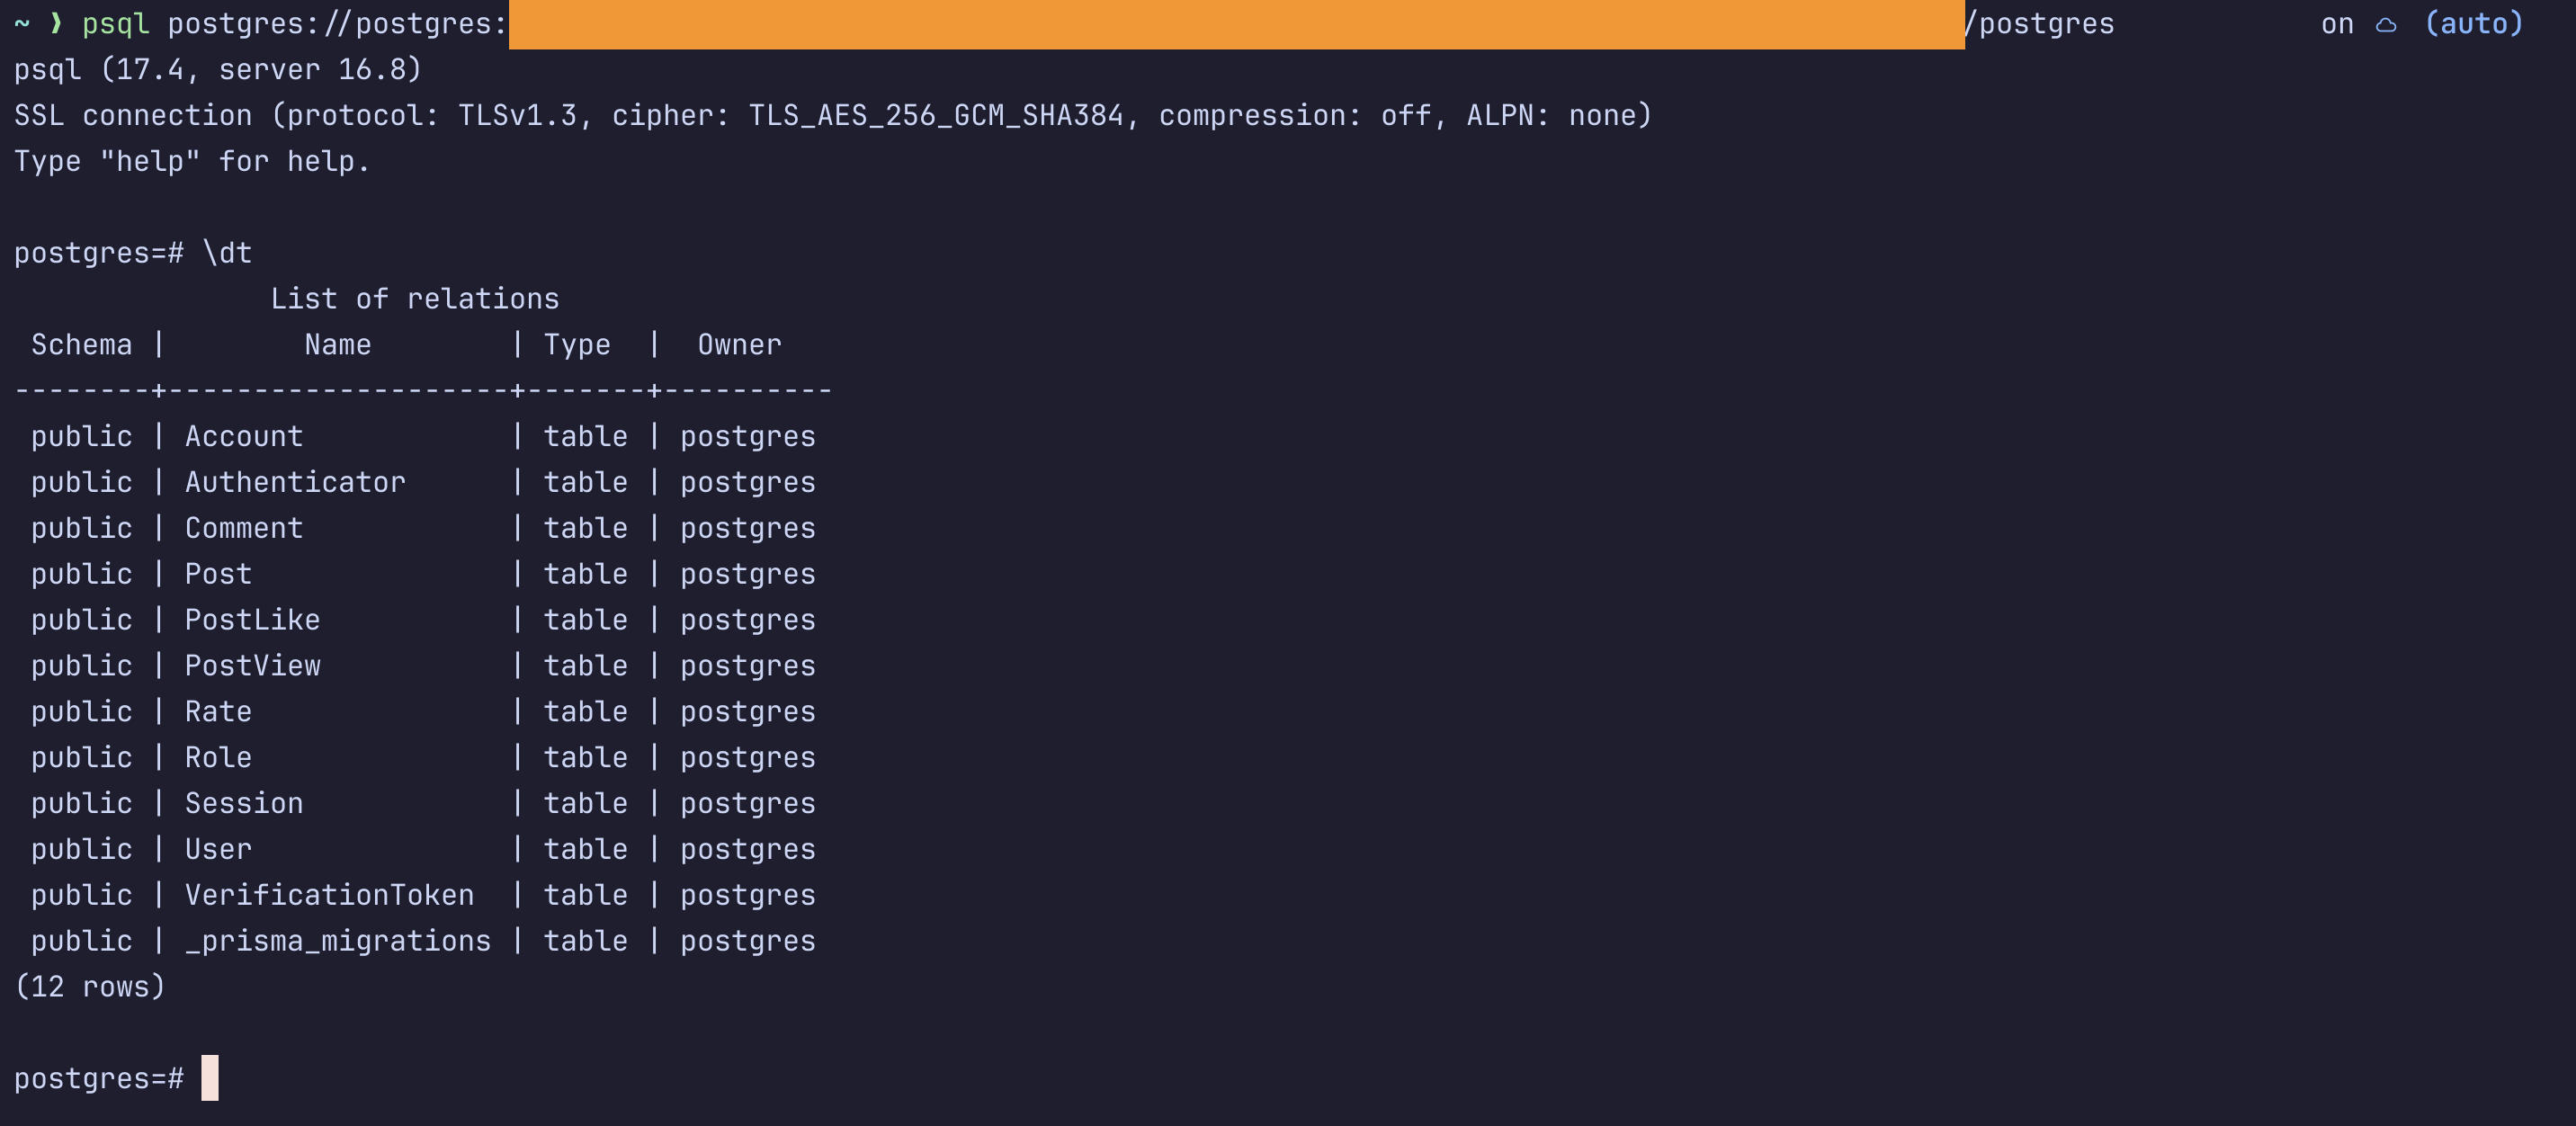
If you succeeded in exposing the DB, try to access the DB with a client tool like psql. The URI of postgres is shown below.
postgres://{POSTGRES_USERNAME}:{SERVICE_PASSWORD_POSTGRES}@{YOUR_HOST}:{POSTGRES_PORT}/{POSTGRES_DB}
Now we will access this postgres public URI in our Route Handler. Before we do that, we need to do something.
Link to the prisma/schema.prisma route and paste the following code.
Bind the postgres URI to the DATABASE_URL environment variable and use the prisma db push command to reflect the current state of the Prisma schema file directly to the database.
NextJS Route Handler
The /api folder structure is shown below.
/api
├── /auth
│ └── [...nextauth]
│ ├── options.ts
│ └── route.ts
├── /comments
│ └── [...comment]
│ └── route.ts
├── uploadthing
    ├── core.ts
    └── route.ts
You just need to paste the files in the path and modify the paths.
Issue Github OAuth
Since NextAuth uses Github OAuth tokens, we'll need to use the
providers: [[.
	GithubProvider({
		clientId: env.GITHUB_ID, // highlight
		clientSecret: env.GITHUB_SECRET, // highlight
		profile(profile: GithubProfile) {
			return {
				id: profile.id.toString(),
				name: profile.name || profile.login,
				email: profile.email,
				image: profile.avatar_url,
			};
		},
	}),
],
OAuth must be issued and set up.
Go to profile -> Settings -> Developer Settings and you will see the screen below.
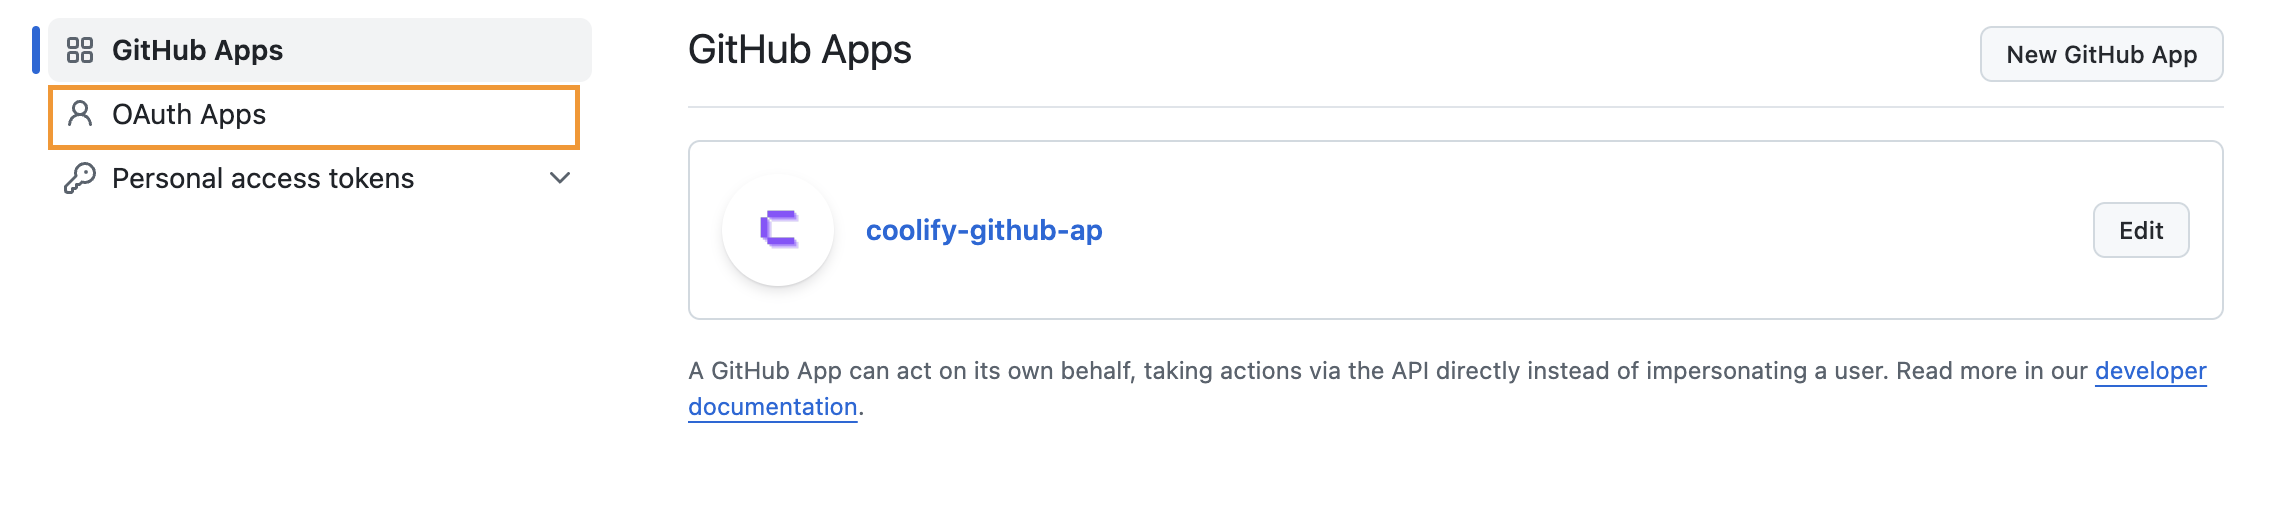
From here, click OAuth Apps to navigate to it. Tap New OAuth app and select the
If you're in a development environment, enter localhost:3000. If you are in a deployment environment, enter your deployment URL and add /api/auth/callback/github to the callback URL.
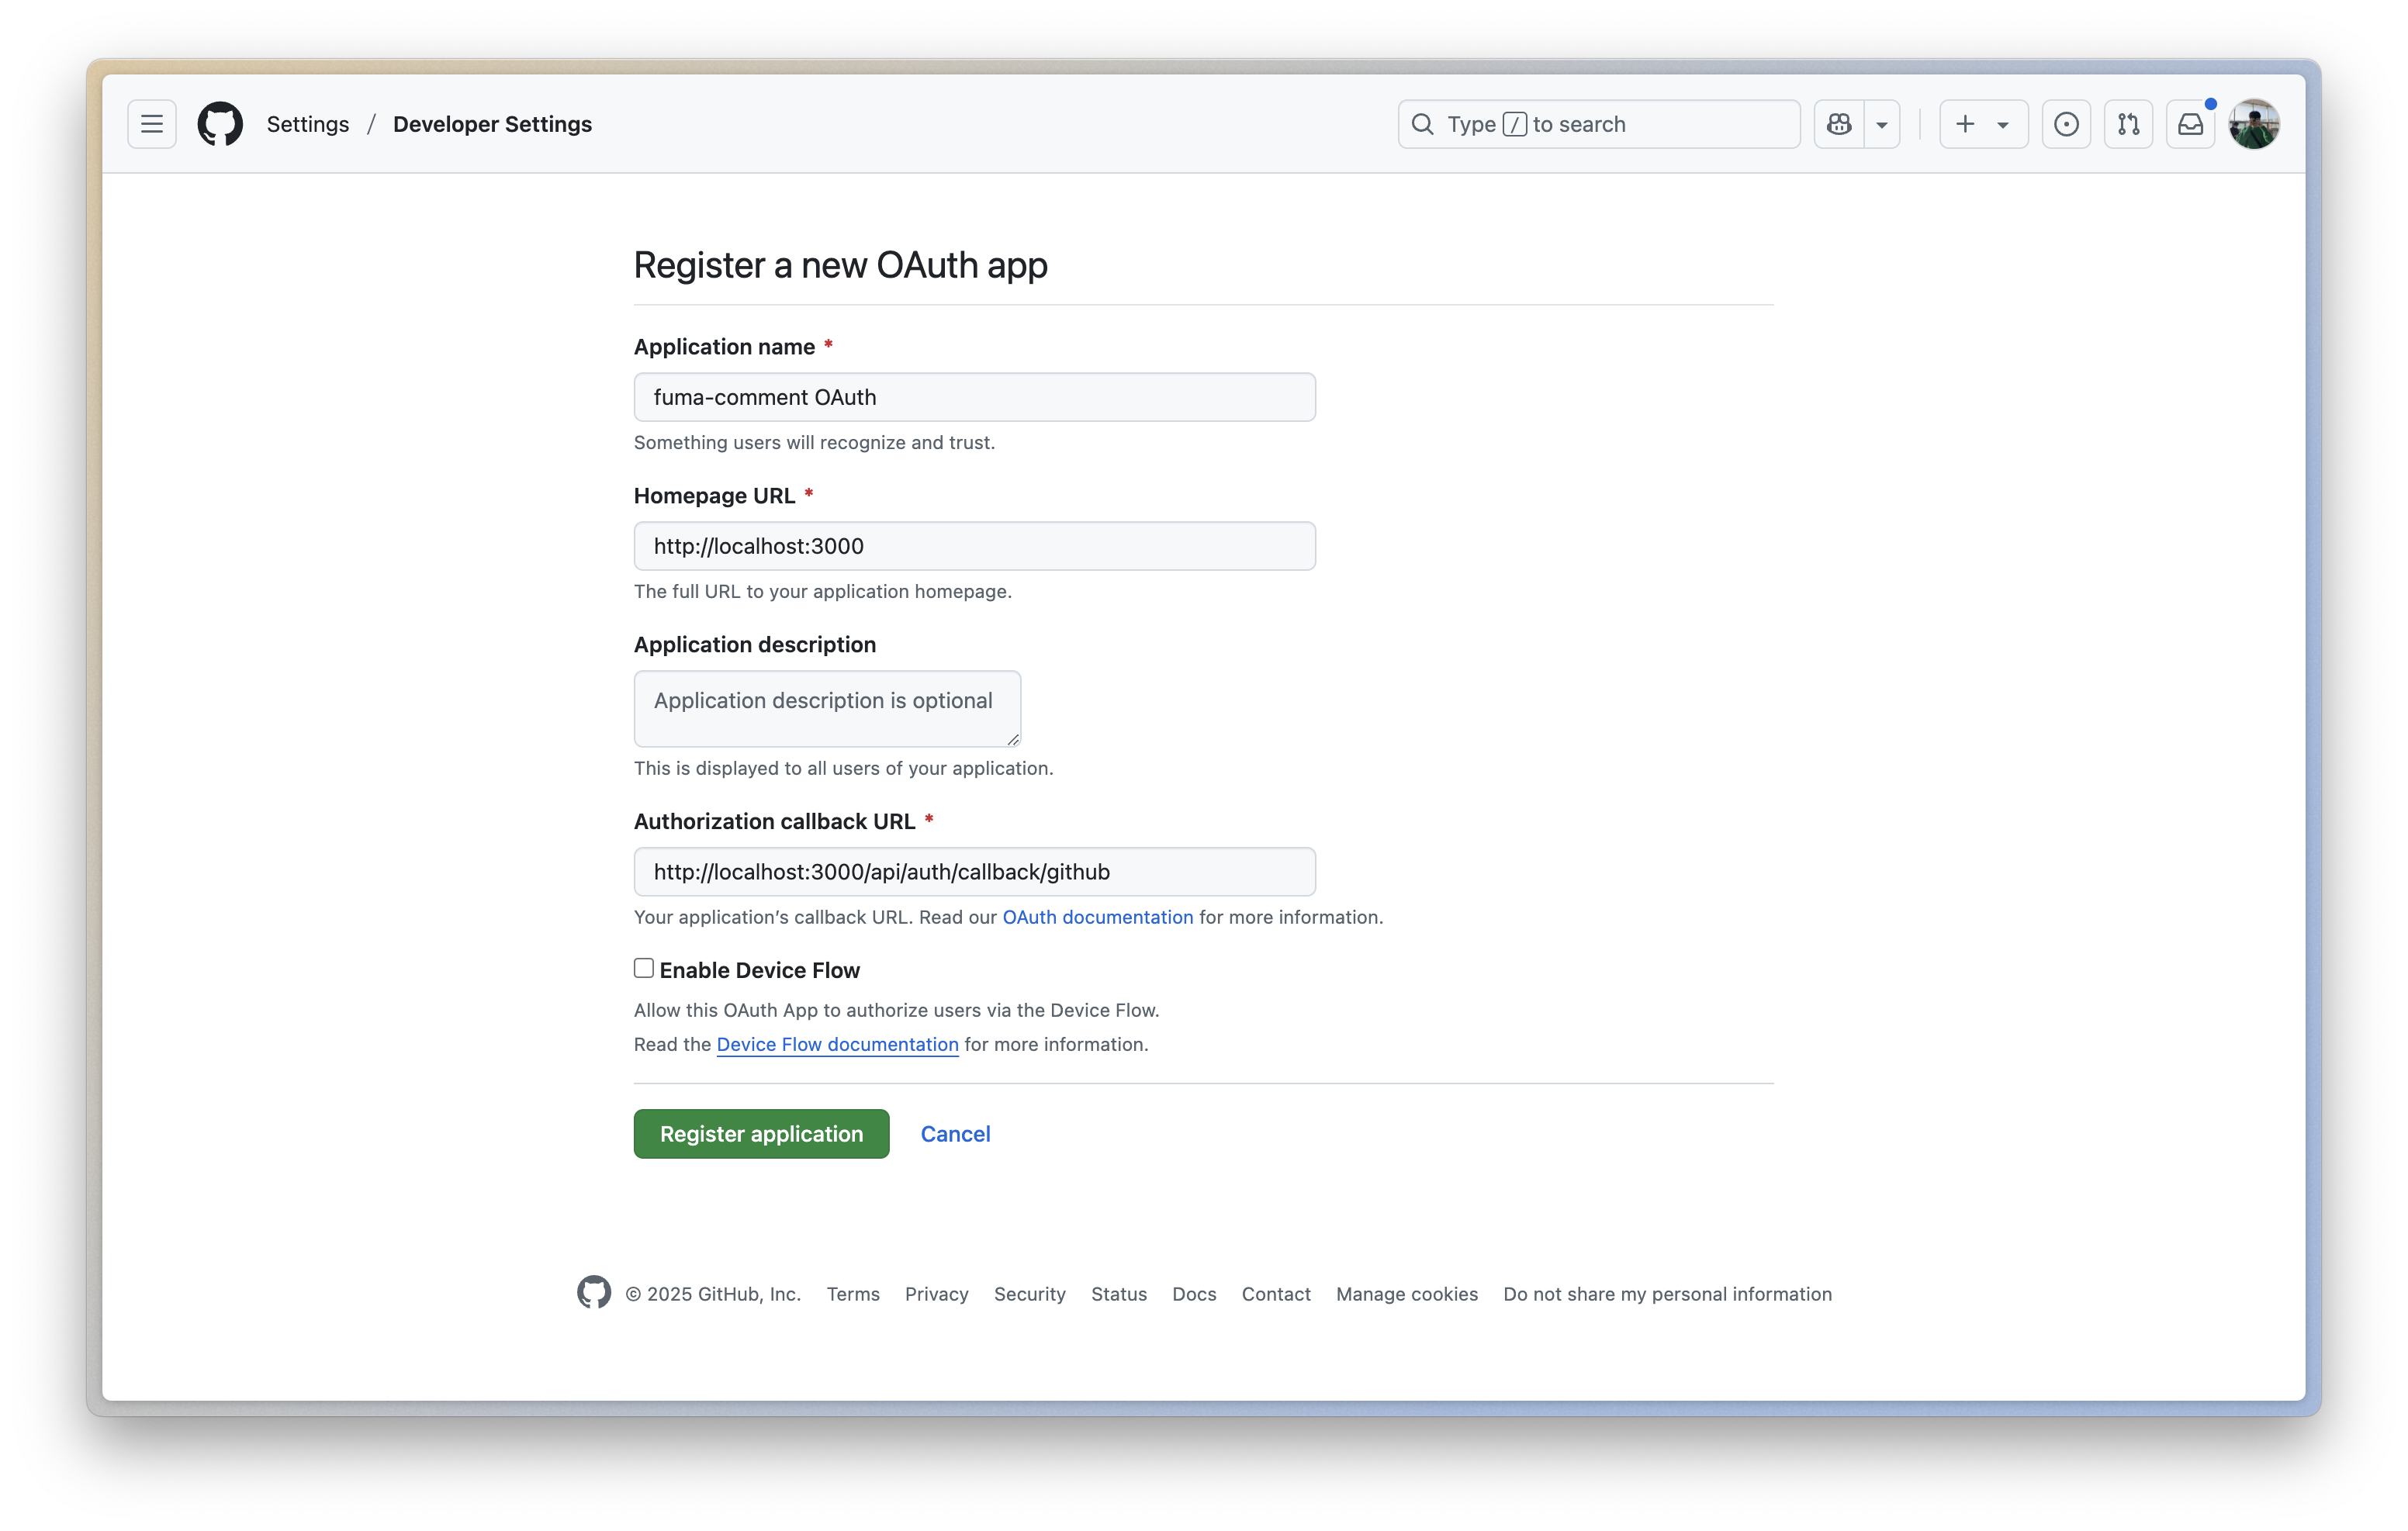
We recommend that you get separate OAuth for development and deployment environments so that they work separately.
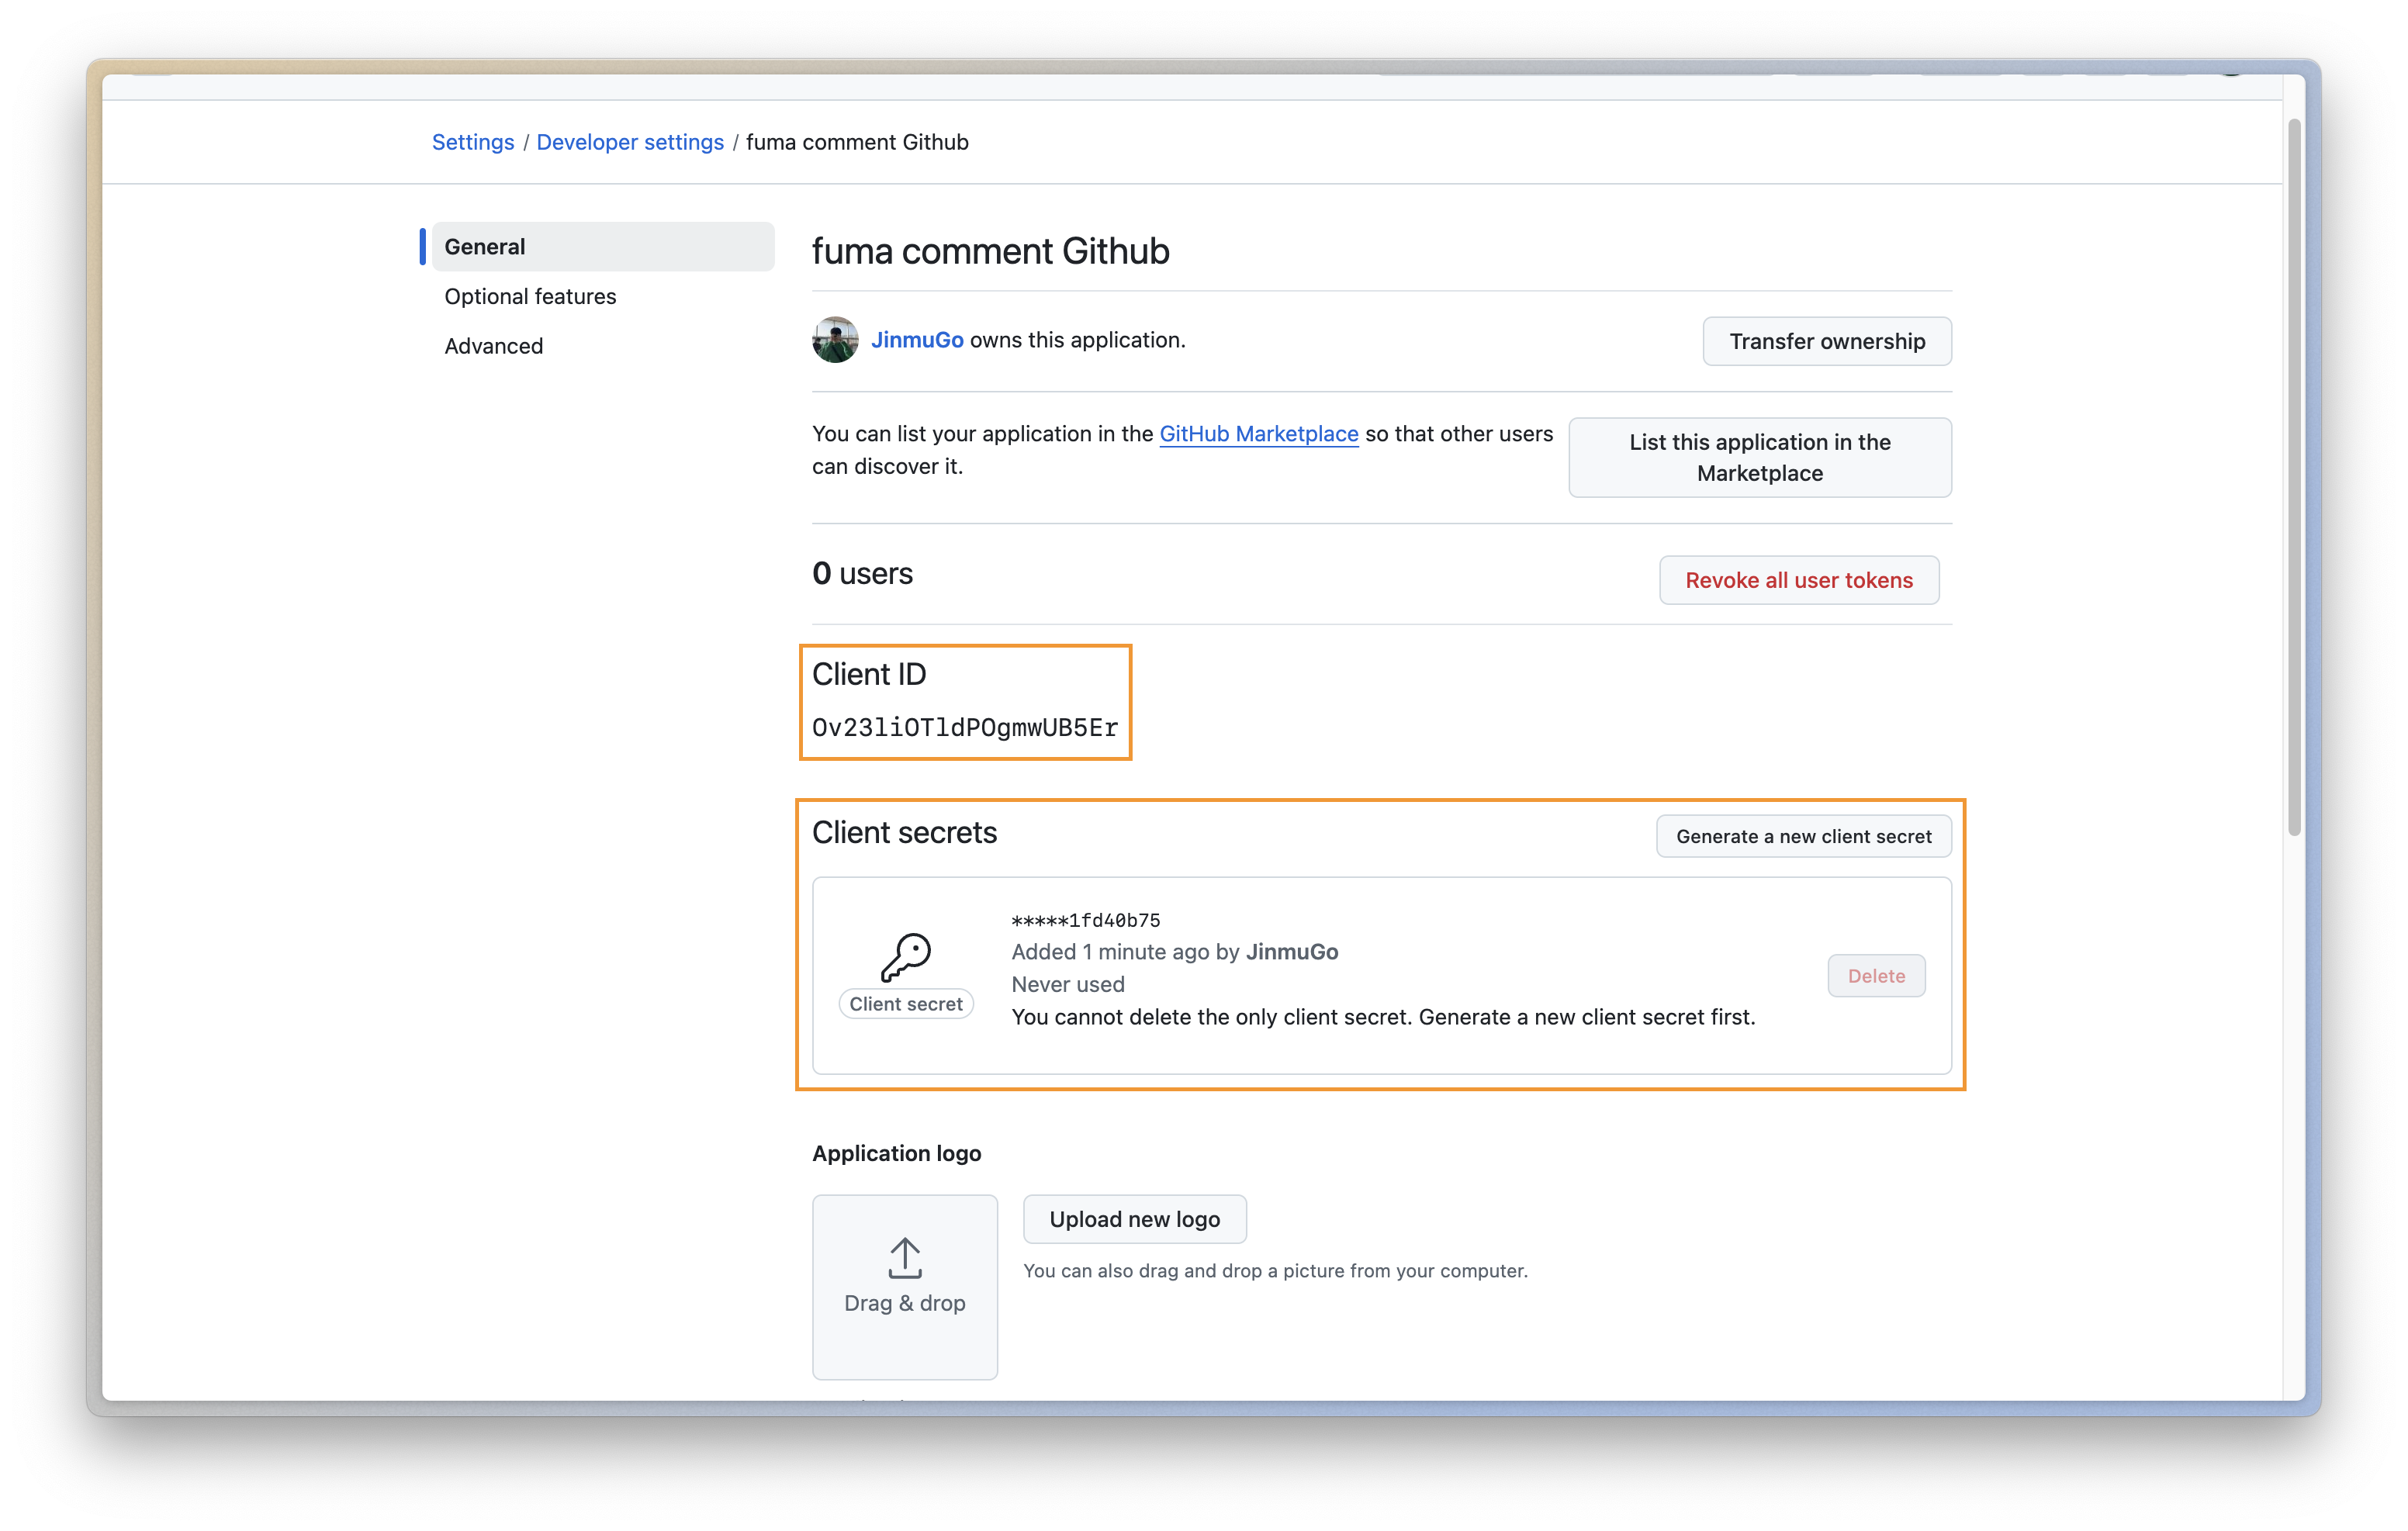
Then get a Secret and bind the values of Client ID and Client Secret to the environment variables GITHUB_ID and GITHUB_SECRET.
NextAuth
You'll also need to set the NextAuth environment variable. You can find them in the link below.
nextauth_url=http://localhost:3000
NEXTAUTH_SECRET=
In particular, NEXTAUTH_SECRET is set in .env.local as AUTH_SECRET, which is an alias of NEXTAUTH_SECRET, when you run npx auth secret in the root of your project, as you can see in the official documentation. You can just rename this and use it.
Uploadthing
Uploadthing is required to use images in comments. In the free tier, 2GB is provided by default. This seems to be enough for a simple blog, so I'm using it for now. If I need more. I'll have to look into other options. cloudflare R2 is compatible with S3, so I guess I could use that.
Anyway, you can sign up and log in at homepage, then go to Dashboard -> API Key and move UPLOADTHING_TOKEN to the .env as it is.
---]
Now you are done with the configuration in Route Handler. The code is all taken from the official repo. The only thing we had to do was to set the env, and we have 6 env's in total.
DATABASE_URL=
GITHUB_ID=
GITHUB_SECRET=
NEXTAUTH_URL=
nextauth_secret=
uploadthing_token=
NextJS Client
And now create a component named CommentsWithAuth.
"use client";

import { signIn } from "next-auth/react";

import type { CommentsProps } from "@fuma-comment/react";

import { Comments } from "@fuma-comment/react";

import { createUploadThingStorage } from "@fuma-comment/react/uploadthing";

const storage = createUploadThingStorage();

export function CommentsWithAuth(props: Omit<CommentsProps, "auth">) {
  return (
    <Comments
      storage={storage}
      mention={{
        enabled: true,
      }}
      auth={{
        type: "api",
        signIn: () => void signIn("github"),
      }}
      {...props}
    />.
  );
}
Then import it into the nextjs page (page.tsx), layout (layout.tsx), or component you want to apply it to, and you're done.
<CommentsWithAuth page={slug} />
By setting the id or slug of each page in the page props, you can customize the comment box for each page. If you want to use the same comment area, you can set the page to the same value.
Outro
I've created a comment function using fuma-comment like this, and it's nice to see how simple it is to create and use, but I think it's more useful because there are so many ways to customize it. Even if you have a little knowledge of NextAuth, prisma, and postgres DB, you can customize it to your liking, which is the best part of this project.
I'd like to thank fuma-nama for creating such an awesome project, and I'll leave you with this.
SeealsoI'm sure there are probably some things I missed while writing this post. Please feel free to leave a comment or mail me and I'll get back to you as soon as possible, thank you.